The Quartermaster Dashboard is a better way to organize your yacht's systems, logs, and toys
What is the Quartermaster Dashboard?
Our Dashboard feature provides an easy way to add and organize your yacht's systems, logs, stores, and even external systems (otherwise known as 'yacht toys').
Set up one or more Dashboards
After you created your yacht(s), you can navigate to your YACHTS menu and click on the
"Configure dashboards" gear button
in the Actions column, on the right. That will take
you to your "Yacht's dashboard configurations" page, where you can add additional
dashboards or change the existing dashboards templates (or background images).
There are several ways you can organize your yacht based on Dashboards.
Create as many different dashboards as you need by clicking the "Plus" add
button at the top:
- Represent the multiple levels of your yacht: Deck 1, Deck 2, etc, or simply Interior and Above Deck.
- Easily access safety information: Through-hull placement, Fire extinguishers, etc.
- Organize your general Ship's Log data in one place: Yacht Data Log with VIN and registration numbers, Trip Log, Ship's Log
- Keep track of your external systems (some might call them 'yacht toys'): dive compressors, stand up paddle boards, surfboards, inflatables, trampolines, even tenders (although we recommend creating a vessel of type 'Tender' for that).
Pick the right template image for your Dashboards
Quartermaster provides a default template or outline image of your yacht based on your
type of vessel: Sail, Power, or Tender. Most fellow yachties prefer to set up their
custom template image based on the original schematics of their yacht.
If you already have access to the schematics of your boat, you can upload that
image by clicking on the "Change" link under the Template column in your dashboard
configurations page (same page as above). This feature is only available on the
non-mobile web application at this time. You can pick a different image for each level
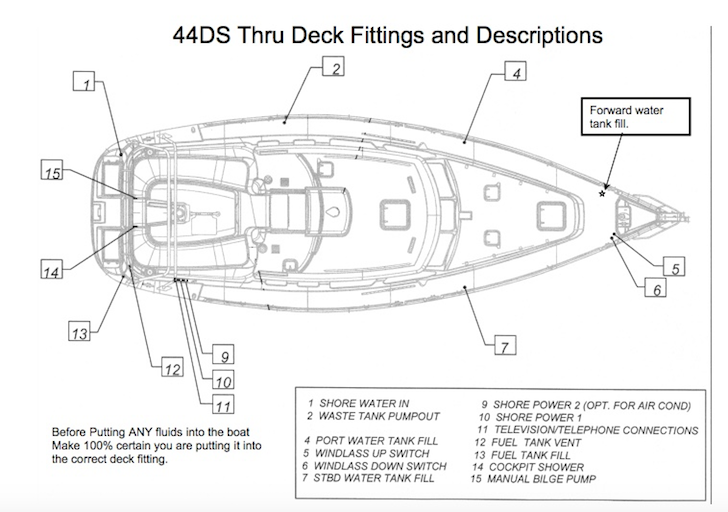
of your yacht if you have the separate schematics. Some owner's manuals come with
schematics that already show the placement of different systems: those are perfect to
use as a template for safety feature placements or wiring schematics for example.
You can upload image file types of .png or jpeg. We recommend your image to have
a width of 1024 pixels with a maximum height of 512 pixels. You can pick a
height that is less than 512 pixels in the uploader if needed. It is important to get
the maximum size and ratio correct here.
Example of an image that was cropped to maximum height of 512 pixels to fit all the
schematic data:
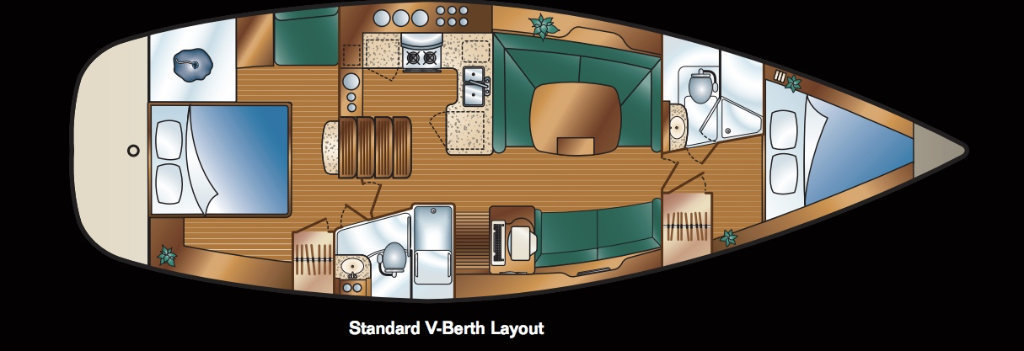
Example of an image that was cropped to the maximum 1024 pixels of width, with a shorter
height:
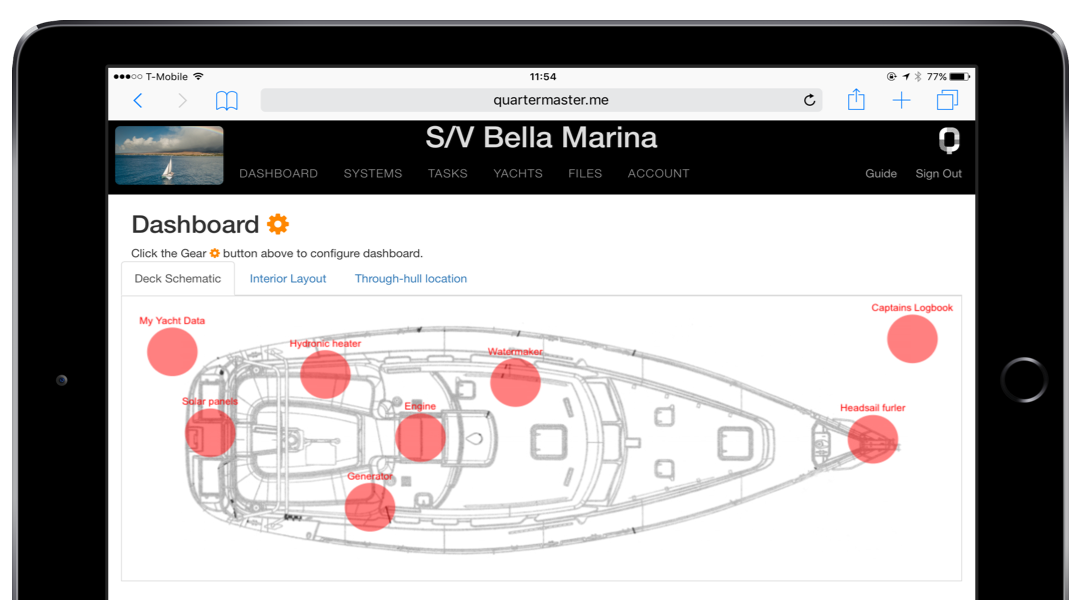
Place your systems and logs on your Dashboard
Now that you are done setting up your templates, you can navigate through the DASHBOARD
menu to see your Dashboard(s).
Your Default dashboard will have a couple of pre-defined systems. You can add, remove
and place systems on your dashboards by using the gear button to enter "Edit mode".
Once in Edit mode, you can use the plus "Add system" button at the top to add a system.
The system will appear in the upper left corner first, and it needs to be dragged on the
dashboard to the right placement (use drag and drop). You can also delete systems off
the current dashboard using the 'x' button in the corner of each system bubble. This
will remove the system off your dashboard, but it will not completely delete it from
your system. This way, you can move systems across different dashboards without having
to re-add them (if you need to permanently delete a system, you can do so from the
SYSTEMS menu).
Press the 'Save' button to save your work.