Managing your storage inventory

Managing your storage inventory in Quartermaster
Similar to Systems, there is a Storage menu item. On the Storage page, a user can create a Storage in a similar way to a System. A storage can contain inventory items.
A storage can be a physical locker or container on your yacht. This makes it easy to keep track of inventory in every locker or container on your boat. Examples of such storage:
- Lazarette
- Master closet
- Pantry
- Toolbox
A storage can also be a virtual concept without a physical location. For example:
- Parts
- Food
- Water toys
You can organise your inventory using either of these concepts or a combination of both. Typically, using a physical storage locaton to manage inventory is the more detailed method and will generally result in a lot of storage containers, each with their own inventory. The virtual method is usually a little simpler for when you just want keep an inventory of some parts or a few other things. It's up to you, the user, to determine what level of inventory you like to keep and how detailed to keep it. On S/V Bella Marina, we keep track of every locker and even on a small 44 foot sailboat, the amount of lockers we have is astounding.
The Dashboard
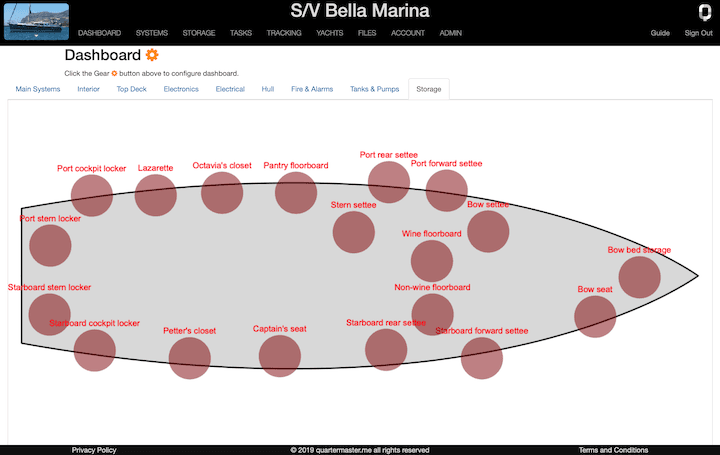
Just like with Systems, you can add Storage directly from the dashboard. Just click the configure icon to activate edit mode and press the + button to add a new item. You'll get a dialog to add a new System. Press the "Storage locker" checkbox and you are now adding a storage. Give it a Description and press Save to create the storage. It should now show up on top of the dashboard. If you have more than one dashboard, press it to select it. Then drag the new storage to a place on your dashboard. If you have already created your storage containers, you can simply activate the cofigure icon to start placing unplaced storage containers on your dashboard. Once you've placed all your storage containers in their appropriate place on your dashboard, the dashboard is a very effective way to quickly get access to its inventory by simply clicking on it.

Inventory

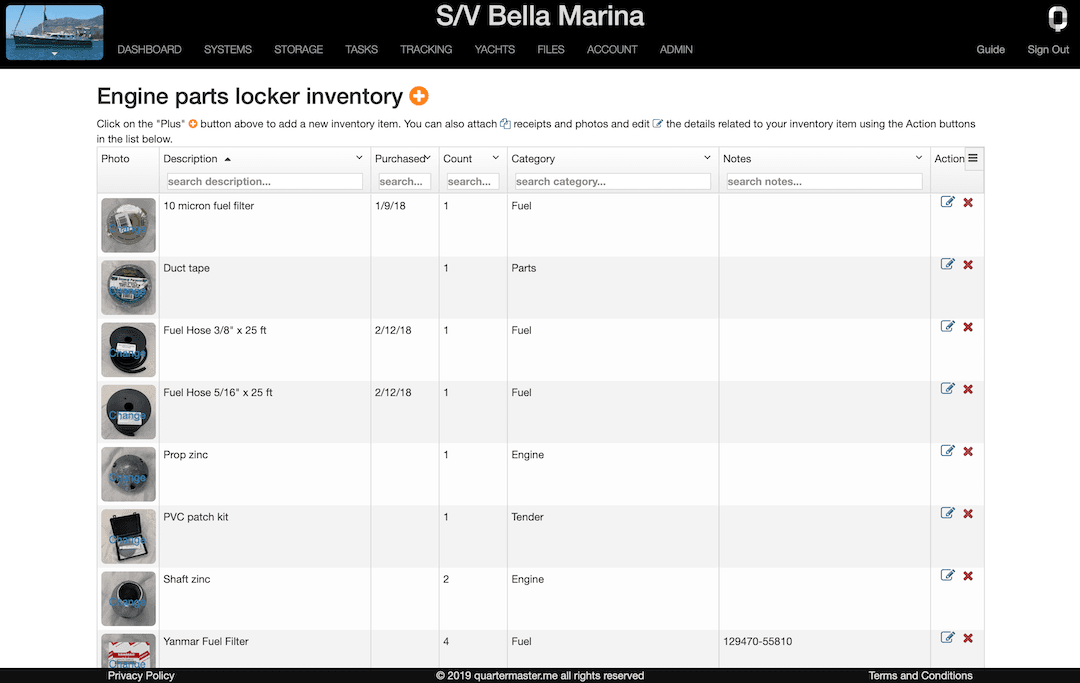
When you click on a storage container, either from the Storage menu or dashboard, you get to the inventory page of that storage. Just press the + icon to add a new item. Most fields are optional. Category is defined by the user. However, if you have already specified categories before, you can pick them from the list. Tip: press spacebar in the Category field or simply start typing the first letter to show a list of previously used categories. In Notes, you can add extra information, such as a SKU or part number.
Photos
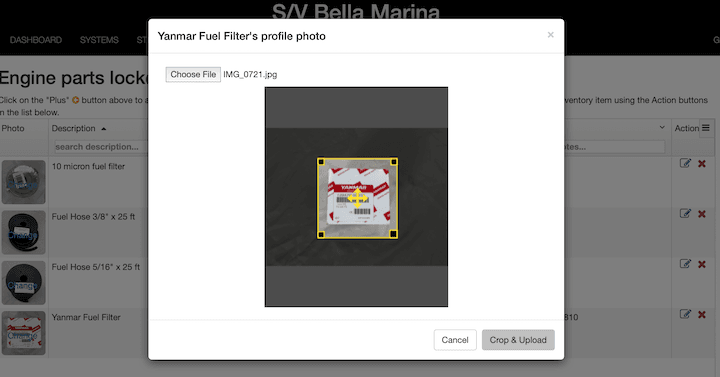
Each storage container can have Photos enabled. This can be done at the time of creation, or simply go find your storage container in the Storage page and click the edit icon from the Action column to make changes. Once enabled, a Photo column will be the first displayed in the inventory page. To upload a photo for an item, click the change link in the photo and pick a JPG photo from your computer. If you're accessing the website from an iPhone or iPad, you will get an option to take a photo or pick from your library. Before uploading the image, you get the opportunity to crop it. To replace an inventory item's photo, just click the Change link, barely visible on the photo to upload a new one. A photo can be a great visual indicator for what you have in your storage, but it also requires a lot of extra work to set it up and is of course optional. Due to performance considerations, only a small thumbnail of your photo will get stored.

CSV Import/Export

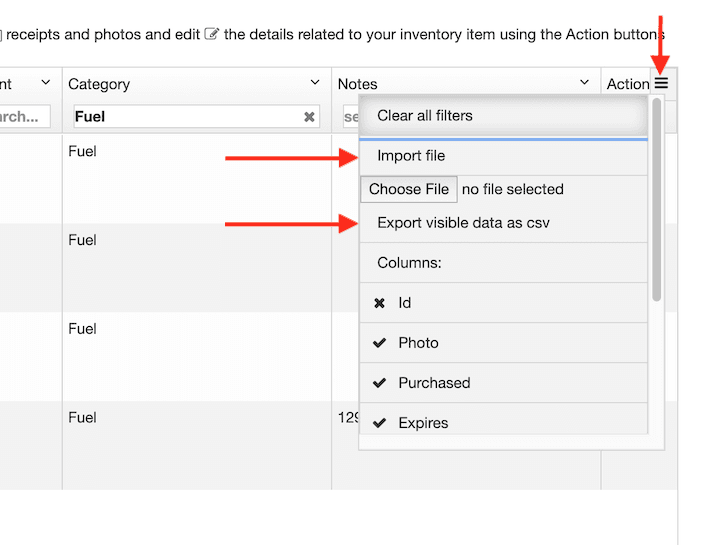
If you were already tracking your inventory in a spreadsheet or other tool, Quartermaster supports importing existing inventory from a CSV file. CSV stands for Comma Separated Values and is an industry standard that most spreadsheet applications (i.e. Microsoft Excel or Apple Numbers to name a few) support. Name your columns in your spreadsheet the same as the Columns in Quartermaster and export them from your spreadsheet to a CSV file. Make sure you specify to include headers in the exported file. Then click the menu next to the Action header in Quartermaster to bring up an additional menu. From there you pick "Choose File" under "Import File", then pick the CSV file that you already exported from your spreadsheet application.
To see a blank sample file, just export and empty inventory from Quartermaster using the same Action menu or check out this sample file for one that's filled out. Tip: You can always delete your imported items and start over. If that's too tedious, you can delete the entire storage container and create a new one. All inventory is deleted if you delete its storage container.